- +36 70 430 7143
- info@bestrong.com
Ideal for aesthetic and safe paving of playgrounds, gyms, terraces and fitness parks.
BeStrong’s fall protection rubber tiles comply with the European Union standard MSZ EN 1177:2008 and are certified by an independent certification body (EMI-TÜV SÜD Kft.).
The BeStrong rubber sheets are not UV stable, they gradually darken in colour under strong UV radiation, but their size and other properties remain unchanged. The size tolerance of the rubber sheets is ±1%.
– Highly flexible material
– Good sound and shock absorption
– Water permeable
– Slip resistant
– Requires minimal maintenance
– Easy and cheap to keep it clean
– Aesthetically pleasing
– Easy to relocate
– Material requirement: 4 pieces/m²
– Weight: 41,2 kg
– Size, thickness: 500x500x60 mm
– Stoppers size: 15 mm
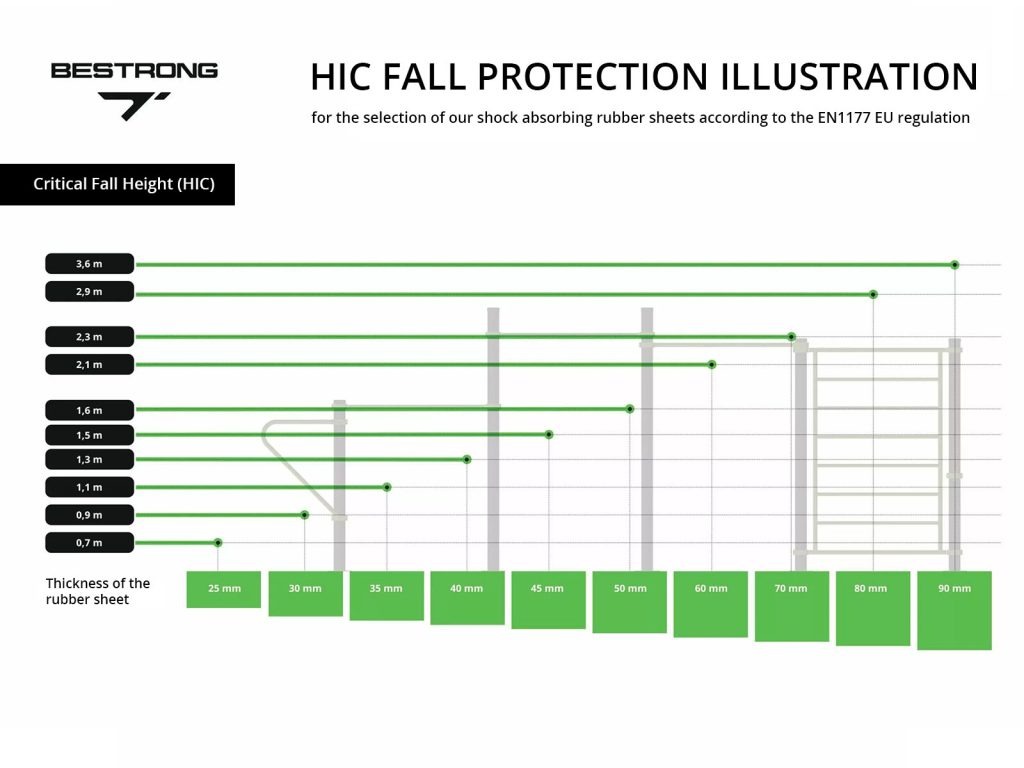
– Critical fall height (HIC value): 2.1 m
– Colour: Black
– Article No.: KAT-GT1-60/15-F
BeStrong Rubber Sheets are not only an excellent choice for playground and leisure use, but also for private, public, industrial and agricultural use.
For light duty applications such as in homes (indoor fitness rooms), we recommend 2.5 to 4 mm thick rubber tiles, while for playground, other public, industrial or agricultural applications, we install rubber tiles with a thickness of over 4 mm for our partners.
In all cases, it is necessary to check the HIC value of the equipment under which the rubber sheet is to be installed. Please feel free to ask our colleagues for help.

The installation of rubber sheets is very simple after proper preparation.
Our rubber tiles can be laid with or without bonding, and can be attached to each other using plastic bonding elements.
For larger surfaces (over 20 m2), we recommend bonding only.
– Indoors
Before tiling, the underfloor heating must be switched off and the rubber tiles must be laid at room temperature. The underfloor heating temperature should not exceed 28 °C.
After accurate(!) measurement, the rubber sheets can be easily cut to size using a decopier saw.
Fit the rubber sheets tightly together, with no gaps between the sheets!
Secure the edging around the rubber sheets with glue to prevent displacement.
– For gravel beds
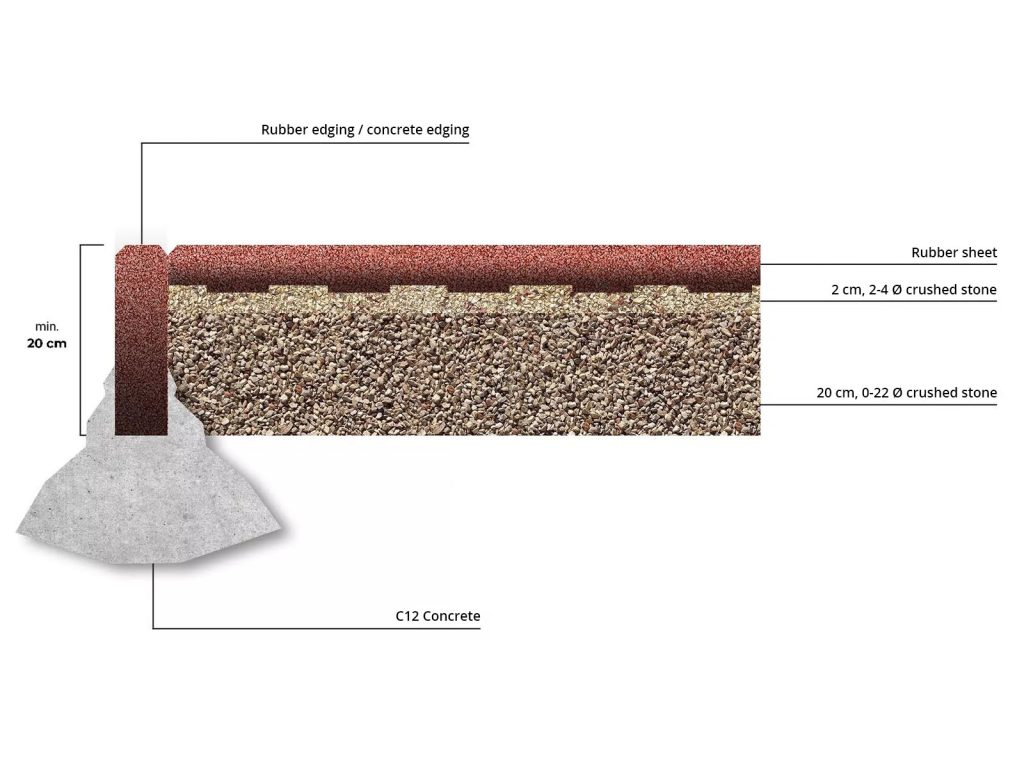
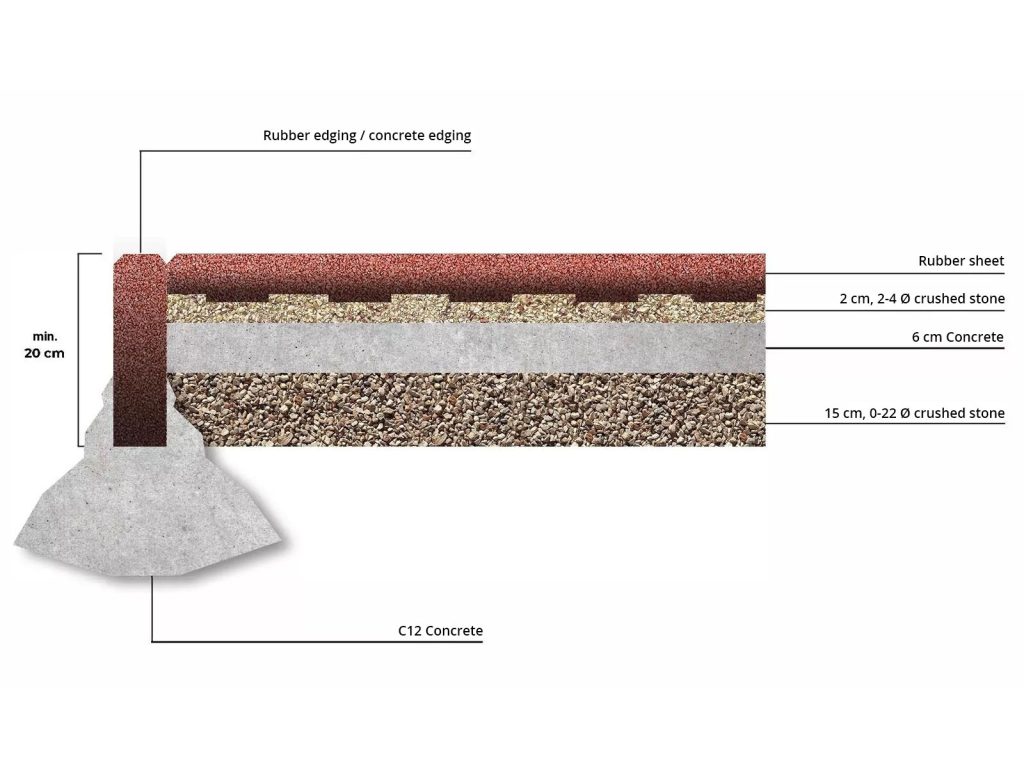
When installing on a gravel bed, the layering sequence is as follows:
The bottom layer is 20 cm of 0-22 Ø crushed rock, compacted twice (every 10 cm) to 90%.
On top of the prepared base, a bed of 2-3 cm of crushed stone with a grain size of 2-4 Ø is made by crushing.
The rubber tiles are installed in advance of the already laid elements. After laying, the pavement does not need to be grouted or swept, but the laid surface should be compacted with a tile vibrator. The cladding can then be loaded immediately.
For this type of installation, we recommend laying the rubber sheets in a bonded layer.


– Bonding to solid surfacing
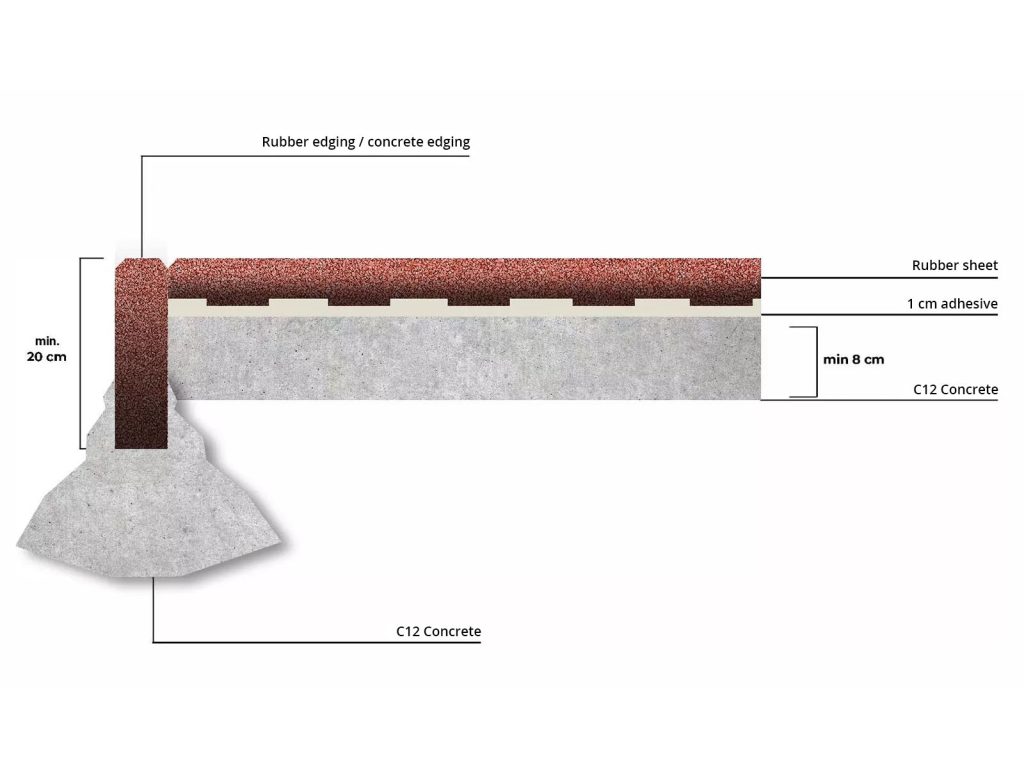
The surface to be bonded must be free from dust, dirt and moisture. Fresh concrete surfaces are unsuitable for bonding. The special rubber adhesive can be applied with a brush or spatula to the underside of the rubber cladding to be bonded. Ensure drainage. After drying, the covering can be loaded immediately.
With this installation method, rubber sheets can be laid in both bonded and mesh form.

Once a week, it is sufficient to wipe the rubber sheets, or wash them with a water jet.
Once a year, it is recommended to recompress with a sheet vibrator. Any wear can be repainted with water-based paint.
It is important that fuel contamination should be removed from the surface immediately, it is only moderately resistant to it. The rubber cover must be protected from open flames or embers!
The volume changes associated with temperature changes during installation must also be taken into account!
The rubber cover will not remain permanently damaged even under high loads.
The load-bearing capacity of the installed cladding depends entirely on the substructure!